How to use Camera Function in Microsoft Excel
- Ketul Patel
- Apr 5, 2017
- 1 min read
Article on using Camera Function in Microsoft Excel

Using the Camera Function in Microsoft Excel
The camera tool allows you to take a snapshot of any selected range of data, table, or graph, and paste it as a linked picture.
The pasted snapshot can be formatted and resized using picture tools. They can be copied and pasted into Word and PowerPoint documents as well.
Enabling the camera function in Excel 2010:
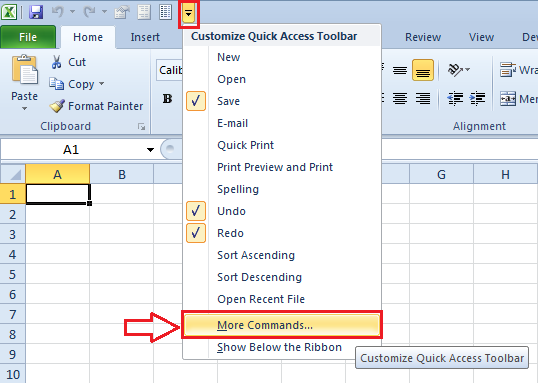
In order to use this feature, you need to make the Camera button appear on the Excel Quick Access Toolbar, because it is not present by default. Head over to Quick Access Toolbar and from the small drop down button, click More Commands...

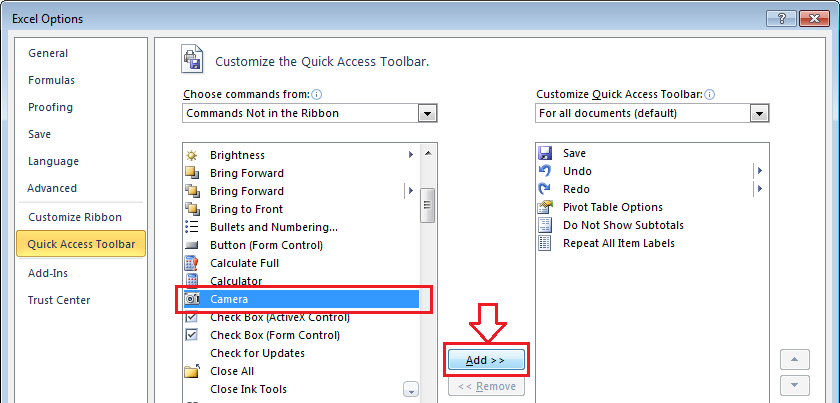
Select Commands Not in the Ribbon

Scroll down the alphabetical list of commands and find Camera, click Add>> button and Click OK to close the Excel Options dialog box.

The camera icon now appears in the Quick Access Toolbar at the top of the screen.

To use the camera, select the portion of the datasheet for which you want to take a snapshot of, and click the Camera button.

To paste the image, left-click the area where you would like the snapshot placed.
Now when you will select this image Picture Tools tab will appear, from where you can apply different styles and designs.

Apply the design and styles which best suites your worksheet image. You can apply shadowing, 3d effects, rotation, colours etc.

Well, that's how you can use Camera Function in Excel. Try it out yourself!!!


Comments